Last updated on March 12th, 2023
This will be a LONG post and updated every few months or weeks.
Just take a coffee, tea or whatever you like, relax and read...
Comments are welcome.
Since this article was growing too much, I decided to split it into three parts, please check the links.
- Original pre Merrill cameras (you're here)
- The Merrill generation
- The Quattro
A WICKED SENSOR FOR THE ENTHUSIAST
I’m shooting with the Foveon sensor-based cameras from Sigma for some time and just now I feel comfortable and with enough experience and knowledge to write something about them. This article is not a review in the usual way.
You won’t see resolution charts, noise measurement graphs nor anything like this. It’s all about my experience with those always underrated cameras and their performance in what matters: the real world.
They have strong and weak points like any other camera.
This topic is NOT a review neither a fairy tale, it's about my own experience with Sigma Foveon cameras over several years.
Note: I don't have anything to do with Sigma, I'm just a user.
First a small prologue:
I started with photography seriously since 1980, when I bought my very first SLR, a second hand Zenit EM. Before this, I used my grandfather’s Zeiss Contessa. From this time to now I may have owned more than one hundred cameras, from snapshooters to some very exquisite medium format cameras. My first digital was a 5 megapixels Olympus C5050Z (2003) and have owned or used lots of digital cameras, from Canon, Nikon, Sony, Pentax, Panasonic, Minolta, Ricoh and of course Sigma.
I’m also a big fan of experimentation, especially in how a lens + camera set scores in real life situations, like in travel photography. I love to use some old classic glass, like Leica-R and also some very generic M42 ones, like the Industar-61 L/Z, a massively produced soviet lens that can deliver stunning images if well used. If you simply take a look at the I-61 MTF chart you'll probably dump it.
My background formation is in science, passing from electronics, then to chemistry, physics and information technology. I worked for some years with scientific instrumentation at the university, especially in ultra-low noise RF amplifiers (used in electronic paramagnetic resonance, a cousin of nuclear magnetic resonance) and an especially proud of an X-Ray diffractometer (for crystallography) retrofit that took one year. Why am I saying this ? Simple: I know how to measure, make graphs, charts that many hardly heard about and even make simple lenses and coatings but I DONT CARE about this. I have a camera for one purpose and it’s for taking pictures, not plotting charts.
Pixel peeping is for fun, but don't take this too seriously. Much more important are the final images.
So, what’s the deal with this Foveon thing ?
First of all, you must know that the "normal" image sensor you have on your camera isn’t a color sensor. It’s a grayscale sensor with a color matrix filter over it. This filter has a red, green and blue pattern that can be arranged in many ways, but they follow the same principle, color guessing (interpolation to be polite) and it's called the Bayer array, and it's a very clever and efficient solution to have color images from a black and white sensor. There are many other types of color arrays like the Fuji X-Trans and Fuji EXR. Sony also played with some variations.

This array covers each of the sensor’s photosite with a colored filter and this particular photosite will then have it’s spectral response narrowed to a small slice of the visible spectrum. Usually, there are twice more green filters than red or blue. I won’t go into details of why this, it’s beyond the scope. Since each “pixel” would be sensitive basically to one color, a sophisticated algorithm is used to estimate the actual color that reached it, based on the surrounding pixels color distribution. This is somewhat easy but lends to some small problems, no matter how good the algorithm is.
The technology needed for real color capturing is not simple or cheap. The first approaching was using three sensors, each one covered by an R, G or B filter and the light split into three beams by a set of half mirrors and/or prisms. This works but it's very expensive and not practical for photographic cameras, although it's used in some very high-end video cameras and for scientific/industrial imaging.
The first problem is common to any kind of image sensor and it’s the Moiré effect. It’s caused by the optical interference from the sensor pixel grid pattern alignment and an eventual geometrical pattern projected over the sensor when the relative distribution is very close to the sensor pattern or a multiple of it. It’s essentially an optical beating. The resulting image may show strange geometrical patterns, like bands and concentric circles.
 |
| "Moire02" by P. Fraundorf - Own work. Licensed under CC BY-SA 3.0 via Wikimedia Commons |
To reduce this, the usual solution is to lower the sensor’s resolving power by using the so-called “anti-aliasing” filter. This filter is a weak diffuser and blurs the image. It’s a trade-off between the chance of an undesired Moiré and a sharper image. To compensate for this added blur, the camera firmware just applies a small sharpen. Sounds stupid but works.
Technically the AA filter is a low-pass filter that attenuates high-frequency transitions. It's an analog blur. This AA filter will ALWAYS destroy information. Then the missing information is partially recovered by a software-based sharpen algorithm that tries to enhance what was left of the high-frequency zones.
Today, many cameras don't have the AA filter and their approach is to minimize moiré directly by a software filter.
The second problem is the less known color alias. This is the Achilles heel of all the Bayer sensors and where the Foveon sensor excels.
But what is aliasing? A quick and easy way to understand what is alias is to just look right. The black, thin lines are the projected image on the sensor surface. The gray grid represents the sensor pixels. Since the sensor pixels are wider than the black line width, the activated pixels together will render a jagged image, in a lower resolution. The higher the resolution, the less visible the alias will be. But this is the simple alias.
But what is aliasing? A quick and easy way to understand what is alias is to just look right. The black, thin lines are the projected image on the sensor surface. The gray grid represents the sensor pixels. Since the sensor pixels are wider than the black line width, the activated pixels together will render a jagged image, in a lower resolution. The higher the resolution, the less visible the alias will be. But this is the simple alias.

When we put the color interpolation and the aliasing effect together, we have a bad secondary effect, the color aliasing. The image below is an easy way to explain what happens with Bayer (left) and Foveon (right) sensors:
 |
| Color aliasing |
This is how a white paper edge over a black background is viewed by a Bayer sensor. In this image, we see the three RGB channels separated. Note that the green channel has two times more pixels than the red and blue ones.
Note the gradient near the edge, caused by color interpolation errors. It's the color alias effect in all its glory and the effect is a border definition loss. Depending on the image, it may look like some sort of chromatic aberration.
It's not very easy to get rid of the color alias. One of the approaches is to apply a color noise filter just at the very high-frequency transitions of the image, followed by a high frequency sharpen. As expected this WILL add some artifacts, more or less, depending on the demosaic algorithm and image appearance itself. There are many of them: AMaZE, IGV, LMMSE, EAHD, HPHD, VNG4, DCB, AHD and at least 10 or 20 more.
For more information, please check this white paper
The Foveon sensor works in a different way. First and the most striking difference is that this sensor doesn’t have (or need) the Bayer filter array.
This is because the color is captured at different depths and each photosite is able to render the three color components at the same time.
Each pixel captures the full-color spectrum and the main consequence of this is there’s no need for a complicated mathematical algorithm just for color interpolation. And this sensor will never cause color alias by definition.
All sensors are prone to some degree of moiré but Sigma decided to strip out the anti-alias filter. The result is a sensor capable of rendering an immense amount of detail but at a price.
There are now many cameras without the anti-aa filter on the market, from various makers and they're pretty good. Sometimes you get a moiré that may be fixed by software. It's the price you sometimes have to pay for extreme sharpness.
The following image shows the difference between how the Bayer array and the Foveon get the colors.
The X3 sensor works in a 3D-like way (in the sense of the color being related to the depth below the sensor surface) and the Bayer matrix has "holes" in its distribution. The Foveon is more elegant but far more difficult to make. It's a very expensive sensor considering it's native resolution.
There are some points that need clarifying. The first point is about what Sigma "understand" by resolution. For example, the Foveon sensor used in the Sigma SD15 has 2652 x 1768 pixels and this means a 4.7 Mp image and no one on earth would argue about this except Sigma, who claims it’s a 15 Mp sensor. They consider the three layers as three pixels on the Z-axis. Whatever. The image quality is unsurpassed.
On the other hand, a Bayer sensor has 50% of its pixels on green, 25% on red and 25% on blue. Suppose now a 15 Mp Bayer sensor. Would it be fair enough to say that its resolution is 7.5 Mp on green and 3.25 Mp on red and blue ?
This is being a never-ending debate since the Foveon appeared.
For me, it’s simple:
Bayer sensors have less color resolution than the Foveon. It’s a fact. But Bayer sensors have usually higher dimensional resolution compared to Foveon sensors. It’s a trade-off and all about what you expect and/or need.
On the other hand, Foveon sensors can extract more information (detail) from an apparently lower resolution sensor.
In my experience, the detail from a 4.7 MP Foveon is on par or higher than a 12 MP bayer, based on side by side comparison between a Sigma SD15 and a Canon EOS 5D with the same lens. You're free to disagree.
If you need, want or just like gigantic images, Bayer sensors are your choice. On the other hand, if you like extreme detail, go for Foveon.
It's very important to keep clear that the 3 layers of the Foveon sensor are sensitive to all colors, but each layer is more sensitive to its "own" color.
That's the theory.
We can separate Foveon sensors in four main groups
- Early 3.4 x 3 MP
- Early 4.7 x 3 MP
- Merrill
- Quattro
August 13th 2015
In my experience, the detail from a 4.7 MP Foveon is on par or higher than a 12 MP bayer, based on side by side comparison between a Sigma SD15 and a Canon EOS 5D with the same lens. You're free to disagree.
If you need, want or just like gigantic images, Bayer sensors are your choice. On the other hand, if you like extreme detail, go for Foveon.
It's very important to keep clear that the 3 layers of the Foveon sensor are sensitive to all colors, but each layer is more sensitive to its "own" color.
 |
| Foveon layers sensitivity curves |
That's the theory.
We can separate Foveon sensors in four main groups
- Early 3.4 x 3 MP
- Early 4.7 x 3 MP
- Merrill
- Quattro
Sigma First Generation DSLRs
August 13th 2015The first commercial model was the SD9, a big, heavy and odd camera body. It has a Foveon X3 "10 MP" APS size sensor, with an output resolution of 2268 x 1512 pixels x 3 layers. The output image size is equal to a 3.4 MP camera, but with far more detail per pixel.
 |
| Sigma SD9 with a Leica Summicron-R 50/2 lens |
- Uses Sigma SA bayonet. At the time it was launched there were just a few Sigma lenses in SA mount, from the old film camera line.
- A very odd but not convenient power supply with two CR123 lithium batteries AND four AA batteries. The first set powers the shutter and the second, the digital part.
- No JPEG output, just the X3F raw files of the first generation.
- ISO range up to 400 but better to stick at 100-200
- VERY, VERY slow when saving to the memory card
- Slow autofocus, very prone to hunt the optimal setting
- Blues are oversaturated (but can be corrected later)
- Eats battery like a beast (the AA set)
Menus and controls were very well thought, simple and intuitive. The optical viewfinder was actually very good, but the rear LCD (like in most of that time's cameras) was small, very dim, low resolution and horrible colors. Better use it just for settings and check framing. There was no live view.
One very cool feature shared by all Sigma Foveon DLSRs is the dust filter, in front of the mirror. This clever solution helps to keep the dust off the mirror, focusing screen and sensor.
 |
| Sigma SD9 / SD10 dust filter |
To be honest and fair, the camera has some cool and important things, like mirror lock up and a very advanced histogram checking tool, linked to the zoom view of the image.
The first generation X3F files from this camera have to be processed using Sigma's proprietary software, Sigma Photo Pro. I need to check if some other software can decode it.
The SD9 was followed by the SD10. It was basically the same camera with some fixes, and the most important was the use of just four AA-size batteries and improved ISO range. No more CR123s, but still eats battery a lot.
The sensors themselves had an important difference. The SD10 has microlenses added to it and a slightly better low light performance, but also slightly less microdetail. Both cameras had the same output resolution. The SD9 sensor doesn't have microlenses.
But how is the image quality from those digital relics ? Quite good IF shot in the exact light conditions, but terrible on high ISO (for this camera, forget above 200).
 |
| Sigma SD9 |
 |
| 1:1 crop from image above |
 |
| Sigma SD9 |
In 2013 Sigma launched new high-performance lenses, the "Art" series and some of them are simply one of the best lenses I had on my hands. I'll make some new pictures with the SD9 with some soon and post here.
The First Generation Compacts
Sigma launched two different compact camera types with this 4.7 MP Foveon X3 sensor: The DP1 and DP2. They had the same sensor but different lenses and electronics.
The 3x4.7 MP Foveon SensorsSIGMA DP-2 first generation
 |
| Sigma DP2 1st generation front |
 |
| Sigma DP2 1st generation back |
My first Sigma camera was the DP-2 first generation. It’s a compact camera fitted with a HUGE, almost APS size 4.7 MP (2652 x 1768) Foveon sensor and a stunning fixed 24.2 mm F2.8 lens, in 6 groups and 7 elements, equivalent to a 40 mm lens fitted to a 24x36 mm sensor or 35mm film camera.
It’s a very spartan camera in look, without any frills, and very well made and with a solid feeling. Some design quirks here and there but overall ok. My immediate thoughts were: My first cell phone had a better LCD than this thing, and why the hell they made black buttons with black marks on them? The buttons on the above camera had its letters and symbols filled with white ink.
It also came with the Sigma Photo Pro 3 CD, and the usual cables, lens cap and strap.
Now, some real-world comments and images.
It also came with the Sigma Photo Pro 3 CD, and the usual cables, lens cap and strap.
Now, some real-world comments and images.
 |
| Sigma DP2 , ISO 100, Program Mode |
This image was taken with the DP-2 first generation. There were 3 different DP-2 at this time, the other two were improvements over the original, the DP-2s and DP-2x.
If you use a Foveon based camera you are supposed to be shooting in raw, not jpeg.
Some people will claim that 4.7 MP was a low resolution when there were cameras capable at least 8 MP at that time, but you must see beyond the obvious to fully understand these little beast capabilities. Below is a 1:1 crop of the image. It’s simply shocking how clean and smooth the image is.

This 1:1 crop shows no sign of color alias and it's extremely detailed for such a small area from a 4.7 MP resolution sensor. Too bad blogger softens the image a bit.
Detail was way better than what I got from the DSLR I used at that time, the Canon EOS 350D with the EF 28mm F1.8 and on par with the EOS 5D with the EF 50 mm F2.5 Compact Macro, even shot in raw.
Of course, the larger images gives you more options in terms of cropping and printing at large sizes.
The 2640 x 1760 image will print extremely well at 300 dpi up to 5.8 x 8.8 inches (14.9 x 22.2 cm) and still able to produce good images at 200 dpi.
But the extreme detail and absence of color alias allow to do a trick, to interpolate the image up to 200% on each axis and still keeping excellent detail. Below, a 1:1 crop of a 200% enlargement, using the Lancsoz 8x8 algorithm. Still looks good eh !

Of course, you’ll see some aliasing, especially at the M and T letters, but it’s small and it will vanish on prints. Keep in mind that a 200% rescaling on each axis means that you have 4 times more points. The image will have 22 million pixels. My suggestion is to use a 150% enlargement if really needed.
This will result in a 3960 x 2640 pixels image (about 10 MP) on pair with the 8 MP images from my EOS 350D, but with better colors. And I’m not talking about complex image boosting with photoshop or anything like, just a plain resize !
Next, some interesting images done with the DP-2.
If you want to see some really interesting images done with this camera, please check Carl Ritterfalk's blog. The images here were shown on my old website and authorized by him.
Take a look at this on his blog:
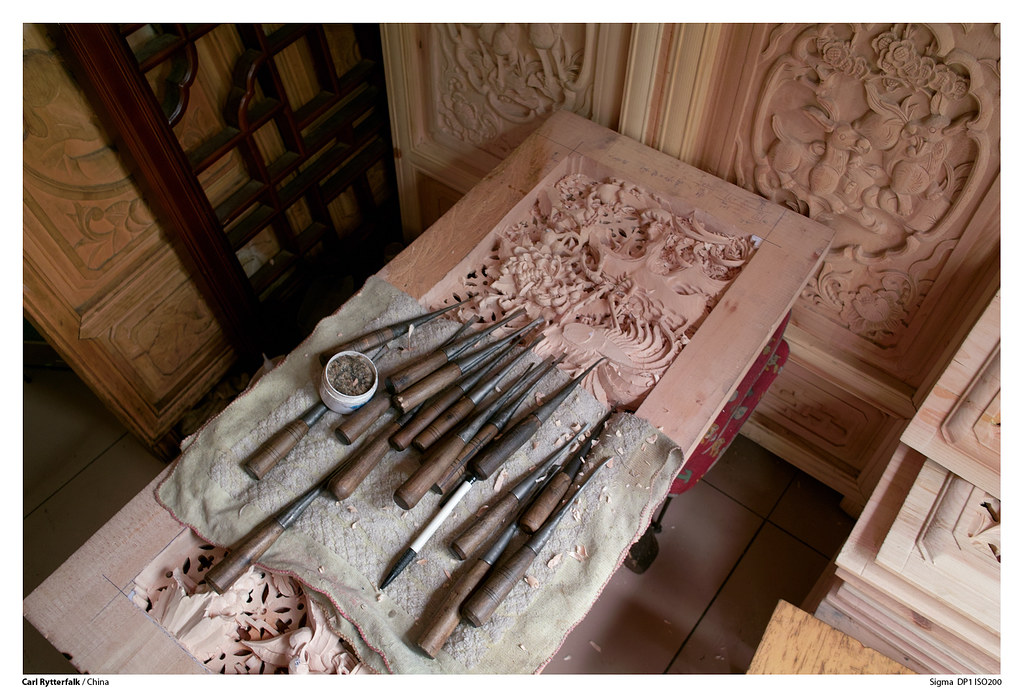 |
| (C) Carl Ritterfalk |
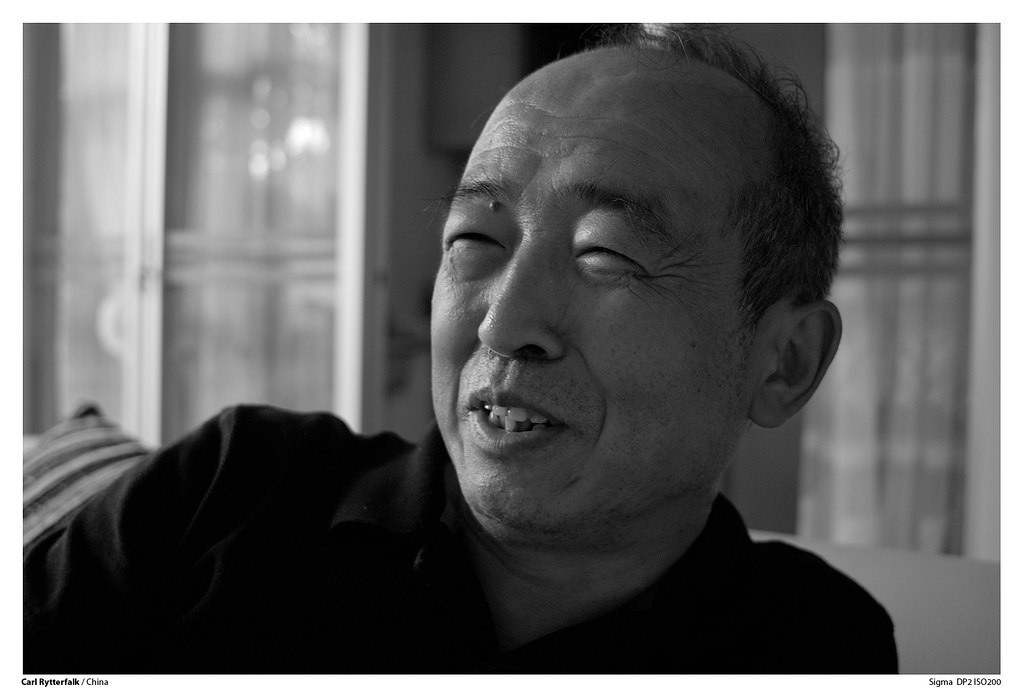 |
| (C) Carl Ritterfalk |
Now some serious stuff with the DP2 first generation...
This picture was shot using auto white balance, raw and program exposure. I used an AML-1 close-up lens from Sigma.
No sharpening, no contrast or color boost was used. It’s just the X3F raw file, converted by Sigma Photo Pro 3 to jpeg.
No sharpening, no contrast or color boost was used. It’s just the X3F raw file, converted by Sigma Photo Pro 3 to jpeg.
 |
| Click here for an 1:1 crop |
The 1:1 crop is quite a good punch for a “mere” 4.7 MP camera, so megapixels are relative. Relax and prepare for a shock.
DP1 (2008)
Sensor: Foveon X3 APS-C size (2652 x 1768 Effective pixels)
Lens: 16.6 mm F4 (5 groups / 6 Elements, 28 mm equiv.)
ISO: 100-800
Processor: TRUE I
The main problem with this camera was the strange behavior of the sensor in high iso and long exposures. It was also VERY slow to write the image file to the memory card. If used in the right light conditions, the image quality was extremely good.
DP1S (2009)
Basically the same camera with some minor improvements I never fully understood. Never had one.
DP1X (2010)
A significant improvement, with a much faster processor, the new TRUE II and an analog front end for the sensor. File writing times are better but still slow. Colors are said to be more accurate, but this is a bit subjective.
DP2 (2009)
Sensor: Foveon X3 APS-C size (2652 x 1768 Effective pixels)
Lens: 24.2 mm F4 (6 groups / 7 Elements, 40 mm equiv.)
ISO: 100-1600
Processor: TRUE II
The DP2 has a much better lens compared to the DP1. It's simply astonishing even wide open, from corner to corner.
Unfortunately, the image quality above ISO 200 is not the best around, with strange banding noise effects and color fading, but very good if you shoot on black and white mode.
The black and white images shot at ISO 800 looks very nice and film-like. But avoid using color mode above ISO 200. You may use 400 if you're desperate.
The good news is the later versions of Sigma Photo Pro and Silkypix can deal very well with the noise. We'll talk about this later.
The Strong and Weak points of the 1st Gen DPs
What's good:
- Very high image quality
- Very high camera building quality
- Extremely high-performance lenses
- Noiseless at base ISO up to 100
- Built-in intervalometer
- A very good quick menu system
What's bad:
- Menu navigation is a pain. Thank god they corrected this on the newer cameras.
- Battery life. At least, Sigma batteries are cheap.
- Slow to write on the card, much faster on the DP2 compared to the DP1, SD9, SD10 and SD 14.
- Murky LCD. Small. Horrible.
- Bad high iso performance. Lot's of banding noise at ISO 400 and above.
- Horrible long exposure results. Avoid longer than 2 seconds because the banding noise will pop up ugly !
The banding noise issue was minimized with the later versions of Sigma Photo Pro (6 and above).
Images processed with Silkypix (V6 and up) shows considerably less noise than with Sigma Photo Pro
Some more pictures below.
 |
| DP2 - ISO 100 |
 |
| DP2 - ISO 100 |
Ok, just 4.7 MP but really rocks !
The DP1 and DP2 are serious tools, with their own quirks, but the final result can blow away even some professional grade 12MP Bayer based cameras.
Finally some colors:

Finally some colors:

The 2nd Generation dSLRs: SD14 and SD15
Both cameras use a 3x4.7 Megapixel sensors and have almost the same features, including the camera exterior.
The main differences are:
- The SD14 uses the TRUE-I processor, the same of the first generation DP1
- The SD15 uses an improved processor, the TRUE-II, the same used on the DP2, DP1S, and DP1X, making it much faster than the SD14 when writing files to the SD card, but still slow.
Both cameras have a dust + infrared filter, placed before the mirror. It protects the sensor against dust and it's user removable.
If desired, the user can remove the IR filter and this gives infrared photography capability to the camera. It's advisable to use an IR bandpass filter, like the R72 in case of pure infrared photography.
Sigma SLR cameras use the SA mount and nowadays there are some very fine Sigma lenses for use with them, especially the ART series. You can also use an M42 to SA adapter, to fit M42 thread mount lenses.
When using M42 lenses, it's very important to check if the lens back won't hit the IR filter when the lens is set to infinity focus, otherwise, the filter will be cracked and a spare one will not come cheap.
 |
| Sigma SD15 |
 |
| Sigma SD15 back |
I won't recommend using the SD14/SD15 at ISOs higher than 400. Try to stick at 100 and use good lenses. The results can be extremely punching and with a stunning detail level.
My advice is to process the X3F raw files with Silkypix or Iridient developer because they deal much better with the high iso noise strange banding patterns. Versions higher than 5.0 of Sigma Photo Pro are also good.
The battery life if generous and the battery itself is one of the cheapest original ones on market and my advice is to always have a spare one.
 |
| Sigma SD15, better than ANY top level phone camera today (2023) |
 |
| SD15 sample |
 |
| 1:1 Crop |
Above, a sample from the SD15. Believe me, the original images are MUCH better than what's here. The images show a visible definition loss when hosted here on Blogger.
My SD15 is fitted with a custom-made manual focus screen with the split image and microprism collar, from Haoda Optics. Too bad Mr. Haoda went out of business.
Like the old SD9/10/14, the SD15 can use other manual focus lenses by modifying the lens mount (on camera or on the lens). Sigmacumlaude.com makes custom camera mounts to use Leica-R, Olympus or Nikon lenses on those cameras. Leitax makes Sigma SA mounts for Nikon, Leica, and other lenses. Both solutions are reversible.
Like the old SD9/10/14, the SD15 can use other manual focus lenses by modifying the lens mount (on camera or on the lens). Sigmacumlaude.com makes custom camera mounts to use Leica-R, Olympus or Nikon lenses on those cameras. Leitax makes Sigma SA mounts for Nikon, Leica, and other lenses. Both solutions are reversible.
Below, another sample was done using an SD15 and the razor sharp Sigma 70mm F2.8 EX DC Macro lens.
 |
| SD15 and Sigma 70mm F2.8 EX DC Macro |
 |
| 1:1 crop - This flower is about 12mm |
 |
| SD15 and Sigma EX DC 70mm Macro |
 |
| Sigma SD15 with Sigma 18-50 F2.8 EX DC Macro |
 |
| 1:1 crop |
Still not convinced? Then take a look at the next two images. The building is at 50m and the lens is a Sigma 17-70 Contemporary.
Please download the original files and take a look.
 |
| Original image here (download it and open) |
 |
| Original image here (download it and open) |
Remember that all the above images from the SD15 are from an OLD 4.7 MP sensor. My former Canon EOS 5D with the fantastic Canon 50mm F2.5 Compact Macro struggled to get close in details.
 |
| Someone said on the Internet that Foveon is not suitable for low-light situations.. Just a matter of knowing how to do, my friend ! Sigma SD15 |
What's good:
- Awesome detail and superb colors
- Excellent battery life. The battery itself is not expensive.
- Ergonomics
- Optical viewfinder clear and bright
- Can use M42 lenses with a cheap adapter
- Can do infrared photography without modifying the camera
What's bad:
- Horrible LCD on the SD14, acceptable on the SD15
- LONG file writing times on card, but has a large buffer
- Not usable above ISO 400. If you need to use 400, be sure to use Iridient Developer or Silkypix.
Conclusion
So, do I recommend any of the above-mentioned cameras ?
This is not an easy question. It will depend on what you expect from a camera.
- They're not point and shoot or anything close this.
- You must shoot in raw and do the proper conversion to jpeg, tiff or whatever you use.
- They are slow cameras, not intended to be used in sports or anything that needs a fast AF and card writing.
- Consider using low ISOs, the lower the best.
- The SD9/SD10 noise is horrible above ISO 400. Even ISO 200 is so-so. Image quality is pretty decent but limited to 3.3 MP resolution. Not recommended in 2017 unless for fun (and you can have lot's of fun with them)
- All cameras with the 4.7 MP Foveon sensor are excellent if used at ISO 100-200. This includes the SD14, SD15, DP1 and DP2 with all subtypes. Colors are wonderful.
On the other hand, they are stunning for landscapes and travel photography and this is exactly where I fit. It's very hard to beat them in this arena.
For me all the DP and DP-Merrill are keepers. The SD1 Merrill is more complicated, but once you figure how to deal with it, it's amazing.
Some years ago I found a post on EDN about the Foveon sensors that's per se the definition of bullshit. The author was SO slammed on the comments that he deleted ALL of them. Check here. Strange comments from who is not a photographer.
Continue reading:
The Merrill generation
The Quattro
No comments:
New comments are not allowed.